Blog

  • I Tried Chicken Liver Pâté at Home. Here’s What Actually Worked.

    Quick game plan

    • Why I even made pâté
    • Real tries, with what went right and wrong
    • My simple, repeatable recipe (with tiny tweaks)
    • Fixes for grainy or bitter pâté
    • Final verdict

    Why I bothered with pâté in the first place

    I grew up thinking pâté was fancy and fussy. It looked smooth. It tasted rich. And it made me feel like I was at a grown-up party, even if I was just holding a cracker. So I finally tried to make it at home. You know what? It wasn’t hard. But tiny things matter. Heat, blending, and butter. Lots of butter.

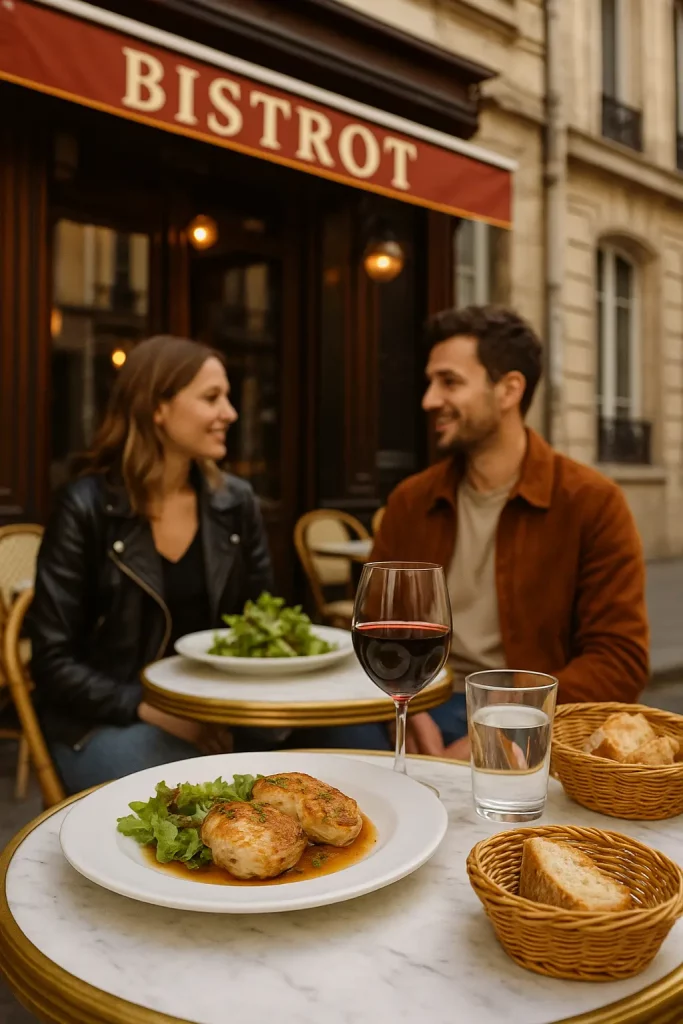
    A sneak peek at the luxe pâté photos on Bistro Le Clochard pushed me over the edge and into the kitchen.

    I tested three batches over two months. I used livers from Trader Joe’s, Whole Foods, and my local butcher. I played with brandy and bourbon. I tried both a Cuisinart food processor and a Vitamix. I messed up once (okay, twice). Here’s the real talk.


    Real Try #1: Weeknight Pâté for My Aunt (and my nerves)

    • Store: Trader Joe’s, 1 lb chicken livers
    • Pan: All-Clad 10-inch skillet
    • Fat: 8 tbsp Kerrygold salted butter
    • Booze: 2 tbsp Cognac (leftover from a gift bottle)
    • Blender: Cuisinart 14-cup food processor
    • Result: Tasty, but a tad grainy
    • Score: ★★★★☆

    I rushed. I cooked the livers until they were fully brown all the way through. No blush. I thought that was safer. The taste was fine, but the texture felt a bit sandy. Not chalky, but not creamy either. My aunt said, “Good with mustard,” which is kind aunt-speak for “needs help.”

    Fix I tried the next day: I warmed 2 tbsp cream and blitzed it in. Smoother, but still not dreamy. Lesson learned: don’t overcook the livers. Leave them rosy in the center, then finish them with carryover heat.


    Real Try #2: Holiday Party Board, Big Win

    • Store: Whole Foods, 1.25 lb chicken livers (cleaned well)
    • Pan: Same All-Clad, medium heat
    • Aromatics: 1 shallot, 1 small garlic clove, 1 tsp fresh thyme
    • Fat: 9 tbsp Kerrygold butter (yep, more)
    • Booze: 3 tbsp brandy
    • Blender: Vitamix on low to medium
    • Result: Silky, mild, spreadable
    • Score: ★★★★★

    This time, I cooked the livers till the outsides were browned, but the centers were still pink. I used my Thermapen, and pulled them at about 160°F. They climbed a bit while resting. I’d picked up that temperature tip from this detailed side-by-side test, and it absolutely paid off.
    An equally helpful note came from the thorough guide on Simply Recipes, which drove home the same rosy-center rule.

    I blended while the mix was warm. I added a splash more butter than the recipe called for. I tasted the salt. I let it set under a thin butter cap in a jar. Served it with cornichons, grainy mustard, and toasted sourdough. People ate it fast. One friend who “hates liver” kept going back. That’s the sign.

    Tiny note: brandy gave a round flavor. Bourbon was nice too, but sweeter. If you’re liver-shy, use brandy.


    Real Try #3: Picnic Jar Pâté (Yes, Outside)

    • Store: Local butcher, super fresh
    • Swap: Used onion instead of shallot; added a pinch of smoked paprika
    • Tool: Cheap stick blender in a tall jar
    • Chill: Packed in a Mason jar and kept on ice
    • Result: Very good, a bit rustic; still smooth enough
    • Score: ★★★★☆

    I wanted an easy travel spread. I’d grabbed the smoked-paprika inspiration from Daring Gourmet, and it brightened the flavor without extra fuss. The stick blender worked fine, but it wasn’t as silky as the Vitamix. My kid liked this batch more, weirdly, because it had more “bite.” I liked the smoky note. I’d do this again for camping or tailgates. Just keep it cold.


    The Simple Recipe I Now Trust

    This is my base. It makes about two cups.

    Ingredients:

    • 1 lb chicken livers, trimmed of green bits and sinew
    • 8–10 tbsp unsalted butter, divided (start with 8; add more if you want)
    • 1 small shallot (or 1/4 small onion), minced
    • 1 small garlic clove, sliced
    • 1 tsp fresh thyme leaves (or 1/4 tsp dried)
    • 2–3 tbsp brandy or bourbon
    • 1 tsp kosher salt, plus more to taste
    • 1/4 tsp black pepper
    • 1–2 tbsp heavy cream (optional, for extra plush texture)

    Steps:

    1. Prep the livers. Pat them dry. Season with a little salt and pepper.
    2. Sauté aromatics. Melt 2 tbsp butter on medium heat. Cook shallot till soft. Add garlic and thyme for 30 seconds.
    3. Brown the livers. Add them in one layer. Cook 2–3 minutes per side. You want browned outsides and a rosy center. A thermometer at 155–160°F is perfect; they’ll finish as they rest.
    4. Deglaze. Add brandy. Let it bubble 20–30 seconds to cook off the harsh note.
    5. Blend warm. Put everything into a blender or food processor with 6 tbsp butter. Blend till very smooth. Add the cream if you like. Taste. Add salt if it needs it.
    6. Jar and seal. Spoon into a clean jar or ramekins. Tap to remove air pockets. Melt 1–2 tbsp butter and pour a thin layer on top to seal.
    7. Chill. Cover and chill at least 4 hours, or overnight. Serve cold with toast, crackers, or celery sticks.

    Notes:

    • If using salted butter, hold back a bit on the salt at first.
    • If it’s too thick, blend in 1–2 tsp warm water or cream.
    • If you want extra silky, strain through a fine mesh sieve before chilling. It’s a little fussy, but it works.

    What went wrong (and how I fixed it)

    • Grainy texture: I overcooked the livers. Fix: pull earlier (rosy center), blend while warm, add 1–2 tbsp cream or butter.
    • Bitter edge: I scorched the garlic once. Fix: add garlic late; keep heat medium. A teaspoon of brandy can also soften the edge.
    • Too “livery”: Add a bit more butter, a squeeze of lemon, or 1 tsp Dijon while blending. Also, soak livers in milk for 30 minutes, then pat dry.
    • Gray color: That’s normal after chilling. Pour a butter cap on top to keep it pretty.
    • Loose pâté: Chill longer, or add a tbsp of softened butter and re-blend, then re-chill.

    Serving ideas that people actually liked

    • Toasted sourdough or Ritz crackers (don’t judge—Ritz works).
    • Cornichons, pickled red onions, or olives.
    • A swipe of grainy mustard.
    • Apple slices or pears in fall. It pops with the brandy.
    • Tiny spoon of jam (fig or cherry). Sweet plus rich? It sings.

    A quick Bay Area detour: if you’ve perfected your pâté but still need willing taste-testers—maybe a date or new foodie friend who appreciates buttery chicken liver as much as you do—check out this practical Skip the Games Bay guide. It breaks down where and how to meet locals who’d rather skip the endless small talk and get right to enjoying good food, so your charcuterie board never goes to waste.


    Safety and storage (the boring part, but do it)

    • Cook livers till the center is at least 155–160°F; carryover will finish it. If you’re nervous, go to 165°F, but keep an eye on texture.
    • Chill fast. Don’t leave warm pâté out for hours.
    • Keep in the fridge up to 4–5 days with that butter cap.
    • Freeze up to 2 months. Thaw in the fridge, not on the counter.
    • If you’re pregnant or have health concerns, ask your doctor first. Liver has a lot of vitamin A.

    Gear I used and liked

    • Thermapen thermometer (saves the batch, honestly).
    • All-Clad skillet (even heat makes life easy).
    • Vitamix for super smooth, Cuisinart for quick and still good.
    • Kerrygold butter for flavor. Plugrá also
  • Cranberry Salad Recipe: My Honest, Hands-On Review

    I’ve made cranberry salad more times than I can’t count. Thanksgiving, Friendsgiving, even a random Tuesday when I wanted something bright and loud on my plate. I’ve tried three kinds: fresh cranberry relish, the fluffy marshmallow one, and a molded Jell-O throwback. Each one has a mood. Each one has a story. And yes, I’ve made a mess with all three.

    Let me explain what worked, what flopped, and the one recipe I keep on repeat.

    The one I keep making: Fresh Cranberry-Orange Relish

    This is the fast one. It tastes bright and tart. It looks like rubies in a bowl. It also makes turkey and ham taste less heavy. My nephew calls it “cranberry salsa,” which makes him eat more of it, so I let it slide.

    Here’s how I do it, after a few test runs:

    • 12 oz bag of fresh cranberries (I buy the Ocean Spray bag)
    • 1 whole orange (seedless; I use the peel and all)
    • 1 small apple, cored (Honeycrisp or Gala)
    • 1/2 cup sugar (plus 1–2 tablespoons more, to taste)
    • Pinch of salt
    • Optional: a tiny nub of fresh ginger, grated

    Steps I actually use:

    1. Rinse cranberries. Slice the orange into chunks. Keep the peel on, but trim off thick white parts. That white part tastes bitter.
    2. Toss cranberries, orange, and apple into a food processor. I use my Ninja. Pulse until it looks like chunky salsa. Don’t let it go full mush.
    3. Add sugar and salt. Pulse 3 or 4 times.
    4. Chill it for at least 1 hour. Overnight is better. The sugar pulls out juice and it gets jammy.

    Real talk:

    • First time I rushed it and served right away. It tasted too sharp. After an hour, it mellowed. After a night, it sang.
    • One time I forgot and used the full orange, thick pith and all. It went bitter. I fixed it with more sugar and a splash of orange juice, but I learned fast.
    • A tiny pinch of salt wakes it up. Weird, but true.
    • It costs less than six bucks. It feels fancy anyway.

    If you'd like to taste how the pros do it before you commit, the seasonal cranberry relish at Bistro Le Clochard is a delicious benchmark. I also wrote a full breakdown of my tests in this cranberry salad deep-dive.

    Pros:

    • Fast, fresh, and safe for folks who don’t want dairy.
    • Color pops on the table.
    • Leftovers taste great on yogurt, oatmeal, toast, or inside a turkey sandwich with mayo and black pepper.

    Cons:

    • It’s tart. Little kids might make a face at first.
    • Texture leans loose, not set.

    Who loved it most?

    • My sister. She spooned it on her mashed potatoes. I said nothing, but I did stare.

    The sweet crowd-pleaser: Cranberry Fluff

    This is the pink, creamy one with mini marshmallows. It’s church-basement cute. I made it for a potluck last fall and watched it disappear next to the deviled eggs. I loosely followed this cranberry fluff salad recipe the first time, then tweaked to suit my own sweet tooth and pantry.

    My take, after two tries:

    • 12 oz fresh cranberries, chopped fine (same food processor)
    • 1 cup sugar
    • 1 can (20 oz) crushed pineapple, very well drained
    • 2 cups mini marshmallows
    • 1 tub Cool Whip (8 oz), thawed
    • 1/2 cup chopped pecans (if you like crunch)

    Steps that saved me:

    1. Chop cranberries and mix with sugar. Chill 30 minutes so they soften.
    2. Drain pineapple like your life depends on it. I press it in a mesh strainer with a spoon. If you don’t, the fluff gets watery. Ask me how I know.
    3. Fold in Cool Whip, then marshmallows, pineapple, and nuts.
    4. Chill at least 2 hours. It sets a bit and tastes rounder.

    Pros:

    • Kids ate it like dessert and called it salad. I didn’t argue.
    • It balances a salty plate.
    • Feels fun and retro.

    Cons:

    • Sweet. Like, sweet-sweet. My husband added chopped toasted pecans to cut it, which helped.
    • If the pineapple isn’t drained, you get soup. My first batch looked like a pink puddle. I still ate it.

    The retro ring: Jell-O Cranberry Salad

    I tried this for Thanksgiving 2019 with a vintage mold from my mother-in-law. It set like a dream and made the table look like a magazine spread. Then it stuck in the pan. I saved it with a warm water dip and a little prayer. It slid out shiny and perfect. (For a more traditional baseline, I referenced a stellar classic cranberry salad recipe from Southern Living before tinkering with my own mix-ins.)

    What I used:

    • Cherry or raspberry gelatin
    • Hot water, cold water
    • Canned cranberry sauce (whole berry)
    • Chopped celery, walnuts, and crushed pineapple

    Notes from my kitchen:

    • The celery adds crunch, which sounds odd, but works.
    • It slices clean, so it’s good for neat plates.
    • It tastes like a party from another time. My grandma would’ve loved it.

    Pros:

    • Holds shape and looks fancy in seconds.
    • Easy to transport.

    Cons:

    • A little artificial. The gelatin flavor takes the wheel.
    • If you rush the set, it slumps. I’ve seen it. It’s not cute.

    Tip:

    • Lightly grease the mold with neutral oil, then wipe most off. It helps it release.

    A savory twist I liked: Wild Rice Cranberry Salad

    Okay, this one bends the “salad” idea, but it’s too good not to share. I took it to Friendsgiving last year, and it vanished.

    • 2 cups cooked wild rice (I used Trader Joe’s)
    • 1 cup chopped kale (spin it dry in an OXO spinner)
    • 1/2 cup dried cranberries
    • 1/2 cup toasted pecans
    • 1/4 cup chopped green onion
    • Dressing: 3 tablespoons olive oil, 2 tablespoons apple cider vinegar, 1 tablespoon maple syrup, 1 teaspoon Dijon, salt, pepper

    Toss. Taste. Rest 20 minutes. Crunch, chew, sweet, sharp. It hits all the notes.

    Note:

    • Not a fresh cranberry showstopper, but it’s great for lunch boxes. My kid ate the pecans first, because of course he did.

    Quick fixes when things go sideways

    • Too tart? Add 1–2 tablespoons sugar or a drizzle of honey. A pinch of salt helps more than you think.
    • Bitter? You used too much orange pith. Add more apple and sugar. A splash of orange juice can distract the tongue.
    • Too watery fluff? Drain pineapple harder. You can even pat it dry with paper towels.
    • Too loose relish? Let it chill longer. The fruit releases pectin and thickens a bit.
    • Too sweet fluff? Add toasted nuts or a squeeze of lemon.

    My final take

    • Want fresh and bright? Make the cranberry-orange relish. It’s my winner. It tastes like winter sunshine.
    • Want a sweet side kids will inhale? Cranberry fluff all the way.
    • Want a showpiece? Do the Jell-O ring and grease the mold, friend.
    • Want lunch tomorrow? Wild rice with cranberries has your back.

    Pro tip: If your newfound cranberry prowess has you eager to share a holiday plate (or just need someone to help demolish the leftovers), the huge classifieds network at Mega Personals makes it easy to post a quick ad and connect with locals who appreciate a homemade side dish, sparing you the awkward “who even likes cranberries?” guessing game.

    For readers in Riverside, CA, who’d rather hand off extra cranberry salad to real-life neighbors than let it languish in the fridge, the locally focused Skip the Games Riverside guide lays out discreet, no-fuss ways to meet new folks who’d happily taste-test your next batch—and maybe bring a potluck favorite of their own.

    You know what? I still make all four, just not on the same day. But if I had to pick one for a busy holiday, I’d grab the cranberries, an orange, and my Ninja. It’s fast, loud, and worth the space on the table. And if you’re branching out beyond cranberries, my recent experiment with homemade chicken liver pâté might inspire your appetizer game.

    Recipe Card: My Go-To Cranberry-Orange Relish

    • 12 oz fresh cranberries
    • 1 seedless orange, peel on (trim thick white parts)
    • 1 small apple, cored
    • 1/2 cup sugar, plus more to taste
    • Pinch of salt
    • Optional: 1/
  • I Tested Three Lychee Martini Recipes (So You Don’t Have To)

    Quick outline:

    • What I look for in a lychee martini
    • My base recipe, with notes
    • Real tries with real brands (good and bad)
    • Garnish tests that actually work
    • Batching for a party
    • Final take

    What I Want From This Drink

    Cold. Clean. A little sweet, but not candy-sweet. I want lychee first, then the booze. No harsh burn. And the glass should smell like a garden after rain. Big ask? Maybe. But I’m picky with this one.

    My Base Recipe (The One I Keep Coming Back To)

    I make this most weekends, and yes, I really shake it at home. Here’s my go-to:

    • 2 oz vodka (Tito’s or Ketel One both work)
    • 1 oz lychee syrup or juice from the can (Aroy-D is my favorite)
    • 1/4 oz fresh lime juice
    • 1/4 oz orange liqueur (Cointreau)

    Shake hard with ice for 12–15 seconds. Double strain into a chilled coupe. Garnish with a canned lychee or a lemon peel.

    Why this works: the lime wakes it up, and the orange liqueur rounds the edges. Without those, it tastes flat. With them, it sings. For comparison, the proportions in the classic Martha Stewart lychee martini lean a touch boozier and a bit drier, so feel free to experiment if you prefer that style.

    If you want to taste a bar-made lychee martini that nails this balance, the version at Bistro Le Clochard is worth the flight.

    Real Tries, Real Notes

    I tested this a lot. Like, “neighbors heard the shaker” a lot. I also cross-checked my numbers against the method laid out in Tasting Table’s rendition and was happy to see my syrup-to-vodka ratio land in the same sweet spot.

    1. Friday Night Test: Tito’s + Aroy-D
    • Ratio: 2 oz vodka, 1 oz syrup, 1/4 oz lime, 1/4 oz Cointreau.
    • Taste: Bright. Floral. Not cloying.
    • My husband said, “This smells like a pear and a rose got married.” He’s right. We both had seconds, which may be why we ordered pizza.
    1. Brunch Try: Grey Goose + Chaokoh
    • Ratio: same as above.
    • Chaokoh syrup tasted lighter and less sweet. I had to add 1/8 oz more syrup to balance it.
    • Goose made it extra smooth but also a bit quiet. Good if you hate bite. I missed a little snap.
    1. Gin Curveball: Hendrick’s + Aroy-D
    • Ratio: 1.75 oz gin, 1 oz syrup, 1/4 oz lime, 1/4 oz Cointreau.
    • Okay, I thought I’d hate this. I didn’t. The cucumber note played nice with lychee. But it did lose that clean “martini” vibe and went floral-herbal. My friend Mia loved it. I still pick vodka.
    1. Liqueur Swap: Ketel One + Giffard Lichi-Li
    • Ratio: 2 oz vodka, 3/4 oz lychee liqueur, 1/4 oz lime.
    • Super smooth. Less sticky. But the lychee was softer, more perfume than juice. Great for date night. Not great if you want big lychee. If that “date night” sounds more like an arrangement and you’re curious where to start, How to Find a Sugar Daddy is a straight-talk guide that covers where to meet generous partners, how to set boundaries, and what to expect, so you can spend less time wondering and more time enjoying well-made drinks together.
    1. Citrus Swap: Belvedere + Yuzu Juice
    • Ratio: 2 oz vodka, 1 oz syrup, 1/4 oz yuzu, no Cointreau.
    • Sharp and fun. Little tart zing. I liked it, but after two sips I added a tiny spoon of syrup. Needed warmth.

    You know what? I thought the gin would win. It didn’t. The base recipe with Tito’s or Ketel One keeps beating the others for me. I logged every shake, sip, and tweak—if you want the full spreadsheet-meets-story recap, you can read it all in my extended test drive.

    The Part No One Tells You

    • Shake time matters. If you shake too long, it gets watery and thin. 12–15 seconds is the sweet spot for me.
    • Double strain if you can. Tiny ice shards mess with the silk feel. A fine strainer fixes that.
    • Canned syrup changes by brand. Aroy-D is thicker and sweeter than Dynasty. Taste first and adjust.
    • Cold glass, always. I stash coupes in the freezer. It makes a real difference.

    Garnish Trials That Actually Pop

    I tried a few. Some were weird.

    • Canned lychee on a pick: classic, easy, pretty.
    • Lemon peel: best aroma. One quick twist over the glass and a wipe on the rim.
    • Lychee stuffed with a raspberry: looks fancy, tastes like candy. Kids at the table stared. I smiled and moved the glass.
    • Tiny cube of candied ginger inside the lychee: my secret win. Sweet heat at the last sip.
    • Floating frozen cranberry: tiny ruby of color; its tart snap reminds me of the zingy cranberry salad I can’t stop making in winter.

    When My Shaker Got Sticky (Whoops)

    One night I used the heavy syrup and didn’t rinse my shaker right away. It glued shut. Hot water saved me, but learn from my mess. Rinse between rounds. Also, sugar rings on your counter look cute until they don’t.

    Batching For A Party

    I did this for Lunar New Year at my friend Lina’s place. We pre-chilled the mix and poured over the night.

    For 8 drinks:

    • 16 oz vodka
    • 8 oz lychee syrup/juice
    • 2 oz fresh lime juice
    • 2 oz Cointreau

    Stir, bottle, chill in the fridge (or freezer if you trust your seal). Pour 3 oz per glass and top with a quick stir over ice or a brief shake. Garnish fast and move on. People will ask for refills. Pro tip: set out a platter of homemade chicken-liver pâté—the rich, savory bite is magic next to these floral-sweet cocktails.

    Pros And Cons (Short And Sweet)

    Pros:

    • Easy to nail with canned lychee.
    • Smells amazing. Looks elegant.
    • Plays nice with many vodkas.

    Cons:

    • Syrup levels change by brand; you must taste and tweak.
    • Too much shaking will thin it out.
    • One is lovely. Three is trouble. Trust me.

    Final Take

    This recipe feels like a small party in a cold glass. My base build wins most nights: 2 oz vodka, 1 oz lychee syrup, 1/4 oz lime, 1/4 oz Cointreau. If you like softer edges, try the lychee liqueur. If you want a garden note, try gin once. I still reach for Tito’s or Ketel One, Aroy-D syrup, and a lemon peel.

    Small moves, big lift. And when that lychee aroma hits your nose before the first sip? Yeah. That’s the moment.

    If you’d rather toast these martinis with someone new—especially around northern Illinois—you can check out the local dating board at Skip the Games DeKalb. It’s a quick way to connect with like-minded adults in the area, so you spend less time swiping and more time clinking glasses.

  • I Tried Making Yogurt in My Instant Pot (So You Don’t Waste Milk Like I Did)

    You know what? I didn’t plan to be a “yogurt person.” Store cups were easy. But the price kept creeping up, and my kids inhale the stuff. So I pulled out my old Instant Pot Duo 6-Quart and said, fine, let’s see. If you’d like a photo-heavy, printable version, I tucked it into this full Instant Pot yogurt guide.

    I’ve made more than 20 batches now. Some were dreamy. Some were sad soup. Here’s what worked for me, what flopped, and the simple recipe I trust when I’m tired and still want breakfast ready by morning.


    My Setup (Nothing Fancy, I Promise)

    • Instant Pot Duo 6-Quart with the Yogurt button
    • Thermometer (I use a ThermoPop, but any quick one works)
    • OXO whisk and a silicone spatula
    • One glass bowl for straining (or the Euro Cuisine Greek Yogurt strainer, which I like)
    • Coffee filters or a big cheesecloth if you want Greek style
    • Starter: 2 tablespoons plain yogurt with live cultures (Fage 2% and Siggi’s plain both worked great for me)

    I keep one silicone ring just for dairy. The curry smell ring? That one stays far, far away.


    Two Ways That Work: “Boil Method” and “Cold Start”

    Here’s the thing. Both make good yogurt. But they feel very different in real life.

    1) The Boil Method (Classic, Most Forgiving)

    This is the one my grandma would trust.

    • Ingredients:

      • 1/2 gallon whole milk
      • 2 tablespoons plain yogurt with live cultures
    • Steps:

      1. Clean the pot well. Rinse with hot water.
      2. Pour in the milk. Press Yogurt until the screen says “boil.”
      3. It heats the milk. When it says “boil,” whisk and check temp. You want 180°F. If it’s not there, use Sauté for a minute or two and whisk. No scorched bits, please.
      4. Cool the milk to about 110°F. I set the pot on a trivet and wait, or I place the inner pot in a sink with cool water.
      5. In a small bowl, mix 1/2 cup warm milk with your 2 tablespoons starter. Whisk that back into the pot.
      6. Press Yogurt again and set 8–10 hours. I do 9 hours for a gentle tang and a nice set.
      7. When it says “Yogt,” it’s done. Chill the pot in the fridge 4 hours before scooping. It sets more as it cools.
    • Real results:

      • Fage starter gave me a mild tang (I’d say 5/10).
      • Siggi’s starter gave me a stronger tang (about 8/10) after 9 hours.
      • 8 hours = softer and mild. 10 hours = thicker and tangy.

    Want a second opinion? I like comparing my notes with the step-by-step directions in this Two Sleevers Instant Pot yogurt guide—their troubleshooting tips line up with what I saw in my pot.

    2) The Cold Start Method (Fast, But Picky)

    This one skips the boil. It saves time. It can also fail if your pot isn’t very clean.

    • Ingredients:

      • 52 oz ultra-filtered milk like Fairlife whole
      • 2 tablespoons plain yogurt with live cultures
    • Steps:

      1. Clean the pot very well. Dry it.
      2. Pour in the Fairlife. Whisk in the starter.
      3. Press Yogurt and set 8–10 hours.
      4. Chill 4 hours before scooping.
    • Real results:

      • My Fairlife batch at 9 hours set firm. It was creamy, not grainy. Tang was medium.
      • One time I rushed and used a damp ring that smelled like onions. That batch tasted… weird. Lesson learned.

    For a clear, spoon-in-hand look at the cold-start process, Simply Recipes offers an in-depth Instant Pot yogurt tutorial that echoes many of the points above.


    My Go-To Weeknight Timeline

    Here’s a real one from last Tuesday:

    • 8:10 p.m. Put 1/2 gallon whole milk in pot. Hit Yogurt to “boil.”
    • 8:40 p.m. It beeped. Temp said 176°F. I hit Sauté for 90 seconds and whisked to 180°F.
    • 9:10 p.m. Milk cooled to 110°F while I folded laundry.
    • 9:12 p.m. Whisked in 2 tablespoons Fage.
    • 9:15 p.m. Set Yogurt to 9 hours and went to bed.
    • 6:15 a.m. Screen said “Yogt.” I peeked. Jiggle looked right. Into the fridge it went.
    • 10:30 a.m. I strained half for Greek style. The other half I kept soft for smoothies.

    Breakfast was ready. No panic. No store run.

    If you ever find yourself with those eight quiet hours while the cultures work their magic and you’d rather do something a tad more adventurous than binge another show, Deltona locals (or visitors) can skim through the straightforward dating rundown at Skip the Games Deltona to line up a low-stress, spur-of-the-moment meet-up—turning the waiting period into a fun night out instead of just watching the clock.


    Wins, Flops, and How I Fixed Them

    • Thin yogurt:

      • Cause: too low temp at boil, or not long enough incubating.
      • Fix: confirm 180°F at boil. Go 9–10 hours on Yogurt. Chill fully before judging it.
    • Grainy texture:

      • Cause: I whisked like a mad person after adding the starter. I also once shocked it with very cold water.
      • Fix: Whisk gently. Cool to 110°F, not lower.
    • Weird flavor:

      • Cause: strong-smelling ring. Also, old starter.
      • Fix: keep a dairy-only ring. Use fresh starter every 4–5 batches.
    • Burnt milk on the bottom:

      • Cause: didn’t whisk during Sauté. Heat sat in one spot.
      • Fix: whisk while heating. Scrape the bottom lightly with a silicone spatula.
    • Over-sour:

      • Cause: I let it go 12 hours once during a soccer tourney day.
      • Fix: stop at 8–10 hours. If it’s too sour, use it for ranch dip, smoothies, or pancakes.

    Taste Test vs Store Cups

    • Plain yogurt from the pot (boil method, Fage starter) tasted clean and creamy. It beat my usual store pick on texture.
    • My cold start Fairlife batch tasted richer. Almost like dessert when I added honey.
    • Kids loved it with strawberries and a small drizzle of maple syrup. They ate it faster than the cartoon cups. I was shocked.

    For a different kind of creamy spread, I recently tackled chicken liver pâté at home and was amazed at how doable (and freezer-friendly) it is.

    If you want to see how chefs turn top-notch yogurt into brunch magic, browse the menus at Bistro Le Clochard and grab ideas for your next weekend spread.


    Cost and Yield (Real Numbers From My Kitchen)

    • 1/2 gallon of milk: around $3.50–$4.50 here
    • Makes about 8 cups yogurt
    • If I strain it to Greek, I get about 5 to 6 cups thick yogurt and 2 cups whey

    Even with a bit of honey and fruit, my cost per cup stays low. Like, less than half of the store stuff. That adds up fast.


    How I Flavor It Without Messing Up the Set

    I don’t add sweet stuff before it sets. I stir it in after it chills.

    • Vanilla and honey (1 teaspoon vanilla per cup, plus a drizzle)
    • Mango + a pinch of cardamom (so good in summer)
    • Blueberries cooked down with a little lemon zest
    • Peanut butter and a spoon of jam for a PB&J vibe
    • Fall twist: pumpkin purée, cinnamon, and maple

    When cranberry season hits, I fold in a spoonful of this zingy cranberry salad — the sweet-tart bite balances the yogurt’s tang perfectly.

    If I want Greek style, I strain with coffee filters in a sieve for 2–3 hours. The Euro Cuisine strainer is easier, though. Less fiddling.


    Little Things That Helped Me

    • I set a sticky note: “Save 2 tbsp starter.” I forgot once and ate it all. Whoops.
    • If I use Fairlife, I don’t boil. But I scrub the pot and ring and dry them like I
  • I Tried My Own Greek Seasoning Recipe. Here’s What Happened.

    You know what? I got tired of bland chicken. So I made my own Greek seasoning. I’ve cooked with it for six weeks now. On busy nights. On slow Sundays. I even tested it against two store mixes. I have thoughts. Some good, some messy, and yes—some a little salty.

    Curious about the exact ratios I landed on? I wrote up every gram and tweak in this detailed Greek seasoning recipe if you want to follow along.

    Let me explain.

    Why make it yourself?

    I wanted lemon, herbs, and a little heat. But not a salt bomb. Store blends can taste great, but they can be harsh. I also wanted a mix that worked on chicken, potatoes, fish, and salad. One jar. Many uses. Less stress on weeknights.

    If you’re a college student trying to feed yourself between lab reports and late-night study sessions, you might appreciate a place to swap two-ingredient miracles with people who get the struggle—check out Instant Chat College where dorm cooks trade budget-friendly recipes, microwave hacks, and even organize group grocery runs to stretch those meal-plan dollars.

    Also, I like the smell. Warm oregano with a hit of lemon? That first whiff made me smile. If you ever need a dose of Mediterranean menu inspiration, take a peek at Bistro Le Clochard—their dishes read like a master class in balanced Greek flavors.

    And if you happen to be planning a laid-back Covington date night where you’d rather spend your time perfecting a lemon-herb chicken than endlessly swiping on apps, locals suggest hopping over to Skip the Games Covington for a streamlined list of social options—saving you time on the logistics so you can focus on pouring the wine and serving that sizzling tray of Greek-seasoned potatoes.

    My tested mix (small batch)

    This makes a little under 1/2 cup. I keep it in a small jar.

    • 2 tablespoons dried oregano
    • 1 tablespoon garlic powder
    • 1 tablespoon onion powder
    • 2 teaspoons dried dill
    • 2 teaspoons dried basil
    • 1 teaspoon dried thyme
    • 1 teaspoon crushed rosemary (rub it between fingers)
    • 1 teaspoon black pepper
    • 1 to 1½ teaspoons kosher salt (start low)
    • 1 teaspoon dried lemon peel or 1/2 teaspoon citric acid
    • 1/4 teaspoon cinnamon
    • Pinch nutmeg
    • Optional: 1/2 teaspoon dried mint or 1/2 teaspoon sumac

    Stir well. Taste a tiny pinch. Adjust salt and lemon to your liking. Store with the lid tight.

    How it tastes: bright, savory, a bit woodsy from rosemary, with a soft warmth from cinnamon. The cinnamon scared me at first. It shouldn’t. It rounds the edges. Don’t go heavy, though.

    Real weeknight tests (what I actually cooked)

    I’m not guessing here. I cooked these in my own kitchen.

    • Greek-ish chicken thighs, Tuesday night: 1 pound thighs, 1 tablespoon seasoning, 1 tablespoon olive oil, 1 tablespoon plain yogurt, 1 tablespoon lemon juice. Rest 30 minutes. Roast at 425°F for 28 minutes. Broil 2 minutes for color. Squeeze lemon. My kid ate two. I had leftovers for lunch with rice and cucumbers. Nice.

    • Crispy potatoes, Friday snack: 1 pound baby golds, halved. Toss with 1 tablespoon olive oil and 2 teaspoons seasoning. Roast at 450°F for 25 minutes. Finish with feta and chopped parsley. The tray came back empty. I stood at the counter and kept “testing.” Oops.

    • Fast salad dressing for work lunch: In a jar, shake 3 tablespoons olive oil, 1 tablespoon red wine vinegar, 2 teaspoons seasoning, 1 teaspoon Dijon, 1/2 teaspoon honey, and a squeeze of lemon. It clings to tomatoes and cucumbers so well. I used it on a desk salad. It felt like real food, not sad greens.

    • Ten-minute shrimp: 12 oz raw shrimp, patted dry. Toss with 1 teaspoon seasoning and 2 teaspoons olive oil. Pan on medium-high, 2 minutes per side. Serve with lemon wedges and a quick yogurt dip. Bright and clean. Not heavy.

    • Simple salmon, Sunday: 1 pound salmon. Rub with 1 teaspoon seasoning and 1 teaspoon olive oil. Broil 6–8 minutes. Add lemon. Eat with roasted broccoli. No fuss.

    • Eggs, lazy breakfast: Scramble two eggs with a pinch of seasoning and a splash of milk. It smells like a diner by the sea. I know that sounds silly, but it fits.

    • Bright cranberry salad, potluck edition: I tossed baby spinach with feta, walnuts, and a spoonful of herb-laced dressing, then folded in tart berries for contrast. The combo reminded me of the flavors I gushed over in my hands-on cranberry salad review.

    What went wrong (learn from my mess)

    • Too salty on grilled chicken the first time. I used 1½ teaspoons salt in the blend and then salted the chicken. It was a lot. I dropped the blend to 1 teaspoon salt and seasoned the meat lightly. Much better.

    • Lemon clumps. My dried lemon peel was chunky and stuck to the spoon. I crushed it with the back of a spoon first. You can also use a tiny bit of citric acid. Go light. It’s strong.

    • Burnt bits on high heat. Garlic powder can char over very hot flames. If I grill over open flame, I season lightly before, then dust a bit more right after cooking with a drizzle of oil and lemon. Problem solved.

    • Mint can taste like toothpaste if heavy. If you use dried mint, keep it to 1/2 teaspoon in the whole batch. A pinch goes far.

    • Old herbs taste flat. My first jar of oregano was stale. I switched to a fresh bag from Penzeys. It made a big difference. Fresh herbs matter, even when dried.

    • Confidence boost: Getting this mix right nudged me to try other kitchen projects—like homemade chicken liver pâté. If that sounds intimidating, my step-by-step pâté experiment breaks down what actually worked.

    Store-bought vs. homemade (quick notes)

    I still keep two brands on hand, because life happens.

    • Cavender’s Greek Seasoning (the yellow label): Tastes bold and salty. A little garlicky. It’s awesome on fries and popcorn. On chicken, I find it too salty unless I go light. It has a strong “Greek diner” vibe. My teens love it on air-fryer potatoes.

    • Penzeys Greek: Herby and clean. Less harsh. I still add extra lemon at the finish. Great for chicken and fish. It smells like a fresh herb mix, not a salt jar.

    Homemade wins for balance. Also, I can tweak it. But Cavender’s is my “I’m tired” backup for fries and cottage cheese dip.

    Tiny tweaks you might like

    • No-salt version: Skip the salt in the jar. Salt your food as you cook.
    • Lemon lovers: Add 1 extra teaspoon dried lemon peel or a small pinch more citric acid.
    • Garlic fans: Add 1 extra teaspoon garlic powder.
    • A little heat: 1/2 teaspoon red pepper flakes. Not Greek, but tasty.
    • Extra herby: Add 1/2 teaspoon marjoram if you have it. It plays nice with oregano.

    How I store it

    I keep it in a clean glass jar, in a cool cabinet, away from the stove. It stays bright for about 3 to 4 months. After that, the herbs fade. I make small batches, so it stays fresh.

    My verdict

    This mix earns a spot on my shelf. It saves me on weeknights and makes plain food sing. Chicken, potatoes, salmon, salad—done. It’s not magic, and it can go salty fast if you’re not careful. But when I hit the balance, it tastes sunny and cozy at once. Like dinner on a patio, even if I’m at my kitchen table with a laptop and a to-do list.

    Would I make it again? I already have. I wrote the recipe on the jar lid, because I got tired of checking my notes. And yes, I still buy Cavender’s for fries. I’m human.

    If you try it, start with less salt, squeeze that lemon, and take a sniff when you open the jar. That smell? That’s your green light.

  • I Tried Avocado Crema Three Ways: My Real-World Review

    You know what? I make tacos a lot. Fish tacos, chicken tacos, even veggie tacos when I’m tired. And one night, my pan-seared cod looked sad. Dry. I grabbed two avocados, a lime, and some sour cream. Boom—avocado crema saved dinner. If you want the blow-by-blow with photos, check out my full avocado crema breakdown.

    Below is my take after making it three ways, many times, in my small, messy kitchen.


    Quick Roadmap (So You Know What’s Coming)

    • What avocado crema is (and how it’s not guac).
    • The 3 versions I tested.
    • My go-to base recipe with real measurements.
    • How I used it on real meals.
    • What went wrong, what worked, and the final pick.

    So… What Is Avocado Crema?

    It’s a silky sauce made from avocado, something creamy, and lime. Think smooth and tangy. Not chunky like guacamole. It’s meant for drizzling or dolloping. More sauce, less dip. (If you want to peek at a classic rendition, I love the balanced version over on The Mediterranean Dish.) I first saw a chef swirl it tableside at Bistro Le Clochard, and that soft green ribbon stuck in my brain.

    I use it on tacos, eggs, fries, bowls, and even on Costco rotisserie chicken when I can’t face another salad.


    The 3 Versions I Tested (Over and Over)

    I made the same base recipe with three different creamy parts. I used my Ninja single-serve blender most days. On lazy nights, I mashed with a fork and called it rustic.

    • Sour cream (Daisy)
    • Greek yogurt (Fage 2%)
    • Crema Mexicana (Cacique)

    Here’s the thing: all three work. But they don’t taste the same, and the texture shifts a lot.


    My Base Avocado Crema Recipe (Works with Any Creamy Base)

    Quick note: I borrowed inspiration from several places—shout-out to the approachable version on Isabel Eats—then tweaked until it fit my taste.

    • 2 ripe avocados (soft but not mushy)
    • 1/2 cup sour cream, Greek yogurt, or crema Mexicana
    • 1 big lime, juiced (I use my yellow OXO squeezer)
    • 1 small garlic clove (half if you hate sharp garlic)
    • 1/4 cup cilantro, packed (stems are fine)
    • 1/2 teaspoon kosher salt (taste and add more)
    • 1–3 tablespoons water, milk, or buttermilk to thin
    • Optional: 1/2 jalapeño (seeded for mild), pinch cumin

    Blend until smooth, or mash well with a fork. If it’s too thick, add a splash of water and blend again. I like a drizzle that flows slowly, like warm honey. Fancy word: viscosity. Plain word: how it runs.


    Real-Life Tests and What Actually Happened

    I used each version for a week, one version at a time. I kept the rest of my routine the same.

    1) Sour Cream Version

    • Taste: Balanced and bright. It felt classic. The sour cream gave it that cool taco-truck vibe.
    • Texture: Very smooth in the blender. Still decent when mashed with a fork.
    • Holds up: Day 2 was still great. On Day 3, it dulled a bit in taste.

    Real meals:

    • Fish tacos with Trader Joe’s corn tortillas and pan-seared cod. A chef friend would say the acid “lifted” the fish. I just say, it fixed dry fish. Win.
    • Sweet potato fries on a Sunday game day. Dipped like a dream. I added a little cumin here, and it slapped. In a good way.

    Rating: 9/10. This is my default.

    2) Greek Yogurt Version

    • Taste: More tang. Lighter feel. A little sharper, which I like with spicy food.
    • Texture: Smooth but a hair less plush. Not thin—just not as rich.
    • Holds up: Best on Day 2. Day 3 tasted more tangy than avocado-forward.

    Real meals:

    • Breakfast eggs with a drizzle and a shake of Cholula. My husband asked for seconds. I did too.
    • A “clean out the fridge” bowl with Costco rotisserie chicken and rice. This version cut through the richness well.
    • Side salad night: the tangy crema was a happy partner to a sweet-tart bowl of cranberry salad.

    Rating: 8/10. Perfect for lighter meals or if you want more zing. Side note: the sharper flavor reminded me of the day I went all-in on herbs and spice—my homemade Greek seasoning experiment.

    3) Crema Mexicana Version

    • Taste: Rich and mild. Silky. Almost buttery.
    • Texture: The smoothest, by far. Blender made it cafe-level.
    • Holds up: Stayed smooth, but the avocado flavor felt softer over time.

    Real meals:

    • Shrimp tacos with cabbage slaw. This felt like a restaurant plate. I wanted a tiny bit more lime, so I added extra juice and a pinch more salt.
    • Elote-style corn at home. Brushed it on warm corn and sprinkled cotija. That was a yes.

    Rating: 8.5/10. Lux and silky. Great for “wow” nights.


    Gear I Actually Used

    • OXO citrus squeezer (yellow). It saves my hands.
    • Ninja single-serve blender cup. Fast, easy to rinse.
    • When I was tired: a fork, a bowl, and some elbow grease.

    A Vitamix makes it extra smooth, sure. But honestly, you don’t need it.


    Mistakes I Made—and How I Fixed Them

    • Used bottled lime once. Tasted flat and a bit weird. Fresh lime is key.
    • Too much garlic. It got spicy in a rough way. Half a clove is enough if you’re sensitive.
    • Overripe avocado. It looked brown and tasted sweet-ish. If it smells off, skip it.
    • Too thick? Add water or milk. One spoon at a time.
    • Browning in the fridge. Press plastic wrap right on the surface, or add a thin slick of olive oil, then cover. It helps. It’s still best within 48 hours.

    Storage note: I keep it in a glass jar. It lasts 2 days for top flavor. Day 3 is fine but not as bright.


    How I Use It (Real Examples)

    • Fish tacos on Tuesdays: cod, cabbage, lime, crema. Done.
    • Chicken bowls on Wednesdays: rice, beans, rotisserie chicken, crema, hot sauce.
    • Fries on Friday. I mix in a tiny pinch of smoked paprika. Very snackable.
    • Brunch eggs on Sunday. I drizzle and add pickled onions. Fancy, fast, cheap.

    Confession: I sometimes send my partner a late-night Snap of that slow-motion crema drizzle—food can be flirty in more ways than one. If you’re curious about keeping those spicy snaps private and want a no-nonsense rundown of the platform’s safety tricks, this straightforward Snapchat sexting guide walks you through privacy settings, screenshot alerts, and best practices so your saucy moments stay fun and drama-free.

    On the flip side, if you’re single in the High Desert and would rather spice up your off-kitchen hours by meeting someone new instead of perfecting a sauce, check out the concise local breakdown at Skip the Games Victorville guide—it highlights smarter, safer alternatives and time-saving tips so you can skip the guesswork and get straight to the fun.


    Tiny Tweaks That Change Everything

    • For heat: jalapeño, seeds out for mild, in for hot.
    • For extra tang: a splash of apple cider vinegar.
    • For shine and body: 1 tablespoon Kewpie mayo. Don’t tell, just smile.
    • For herb lovers: toss in a few mint leaves with the cilantro. It tastes fresh, not minty.

    Final Verdict

    All three work. But if I had to pick one for most nights, I grab sour cream. It’s smooth, bright, and steady.

    • My everyday winner: Sour cream version (9/10)
    • For lighter meals and more tang: Greek yogurt (8/10)
    • For silky, rich nights: Crema Mexicana (8.5/10)

    I keep a jar in the fridge most weeks. It makes average food feel special. And when dinner’s late and the fish is dry, this sauce still saves the night.


    Quick Recipe Card: My Go-To Avocado Crema

    • 2 ripe avocados
    • 1/2 cup sour cream
    • Juice of 1 big lime
    • 1 small garlic clove
    • 1/4 cup cilantro
    • 1/2 teaspoon kosher salt
    • 1–
  • I Cooked a Month on My Pellet Grill. Here’s the Real Scoop.

    I’m Kayla, and my pellet grill lives on my small back patio. I cook on it a few times a week. Some days it sings. Some days it sulks. I kept notes, burned a few things, and fed my family and neighbors. You know what? It was fun.

    For the full blow-by-blow of that four-week adventure, you can peek at the longer write-up here.

    I’m sharing the recipes that actually worked for me. With temps, times, and the exact pellets and tools I used. Plus my mistakes. Because those matter too.


    My Setup (So You Know What I Used)

    • Grill: Traeger Pro 575 (the one with Wi-Fi)
    • Pellets I liked: Lumber Jack Hickory, Traeger Apple, and Pit Boss Mesquite blend
    • Thermometer: ThermoWorks Thermapen ONE (fast and honest)
    • Extras: A-MAZE-N smoke tube (for stronger smoke), Lodge 12" cast iron skillet, pink butcher paper, cheap spray bottle with apple juice

    Before I hit the buy button on that Thermapen, I pored over a couple of solid perspectives—check out this barbecue-focused breakdown of the Thermapen ONE over at Smoked BBQ Source and this thorough kitchen test from Food Network—both nudged me to keep it in my toolkit.

    Alright. Apron on. Let me explain what cooked well.

    If you’re hunting for restaurant-level flavor ideas to riff on at home, take a peek at the wood-fired menu over at Bistro Le Clochard for extra inspiration.


    Recipe 1: Spatchcock Chicken That Crackles

    This is my weeknight hero. Skin that snaps. Meat that stays juicy. I did this four times. It never failed.

    • Chicken: 4 to 5 lbs whole bird, backbone cut out and flattened
    • Rub: Kinder’s The Blend, plus a light coat of olive oil
    • Pellets: Apple (sweet smoke)
    • Temp: 375°F the whole cook
    • Time: 45 to 60 minutes
    • Target: 160°F in the breast, 175°F in the thigh

    Steps I take:

    1. Pat the chicken dry and press it flat. I toss it on a sheet pan and rub both sides.
    2. Preheat the grill to 375°F for at least 15 minutes. Hot grates help the skin.
    3. Cook skin-side up. No peeking for 35 minutes.
    4. Start checking temps. When the breast hits 160°F, pull it.
    5. Rest 10 minutes on the counter. Don’t skip the rest.

    Notes:

    • Salt the bird in the morning if you can. The skin gets glassy.
    • If the skin looks pale, turn on “Super Smoke” early, but keep the temp high later so it crisps.
    • Feeling adventurous? Swap the rub for a punchy Mediterranean blend—my DIY mix is laid out in this Greek-seasoning experiment.

    Flavor read: light apple smoke, clean chicken taste. My kid ate the wings right off the board. No sauce needed.


    Recipe 2: 3-2-1-ish Baby Back Ribs (My Neighbor Asked for the Rub)

    I say “ish” because I trim the wrap time. I like a slight tug.

    • Ribs: 2 racks baby backs, membrane off
    • Rub: Meat Church Honey Hog + a dust of black pepper
    • Spritz: Apple juice in a cheap spray bottle
    • Pellets: Hickory
    • Temps and times:
      • 225°F for 3 hours (spritz every 45 minutes)
      • Wrap in pink paper with a splash of apple juice for 1 hour
      • Unwrap and sauce for 30 to 45 minutes

    Targets:

    • Bend test: pick up the rack with tongs. It should crack but not break.
    • Internal: about 195°F to 203°F between bones, but feel matters more.

    Steps:

    1. Rub heavy and rest in the fridge 1 hour.
    2. Smoke at 225°F. Keep the lid shut. Spritz here and there.
    3. Wrap for 1 hour. Paper keeps bark better than foil.
    4. Unwrap, brush with Sweet Baby Ray’s or your fave. Set the sauce.
    5. Rest 10 minutes. Slice.

    Notes:

    • If your grill runs cool, add the smoke tube in the first stage. It helps bark.
    • Dry ribs? You went too long in the wrap. I did that once. They still got eaten.

    Recipe 3: Reverse-Seared Ribeye (Pellet Grill + Cast Iron)

    Pellet grills don’t sear great alone. So I cheat with a hot skillet. It works. It’s steakhouse good.

    • Steak: 1.5-inch ribeye, room temp
    • Seasoning: Coarse salt, black pepper, tiny dot of butter at the end
    • Pellets: Mesquite blend (bold and beefy)
    • Step 1: 225°F until the steak hits 115°F internal
    • Step 2: Sear in a ripping hot cast iron skillet, 60 to 90 seconds per side

    Steps:

    1. Smoke the steak at 225°F. It takes about 30 to 45 minutes.
    2. While it smokes, put the cast iron on the grill at high heat or on your stove.
    3. When the steak hits 115°F, sear both sides. Spoon a little butter on top.
    4. Rest 5 to 7 minutes. Slice.

    Notes:

    • I tried searing on the grill grates. It was okay. Cast iron was better.
    • Mesquite gives a real steakhouse vibe. Apple was too soft here for me.

    Recipe 4: Easy Smoked Salmon (Sunday Supper)

    Simple, clean, pretty. Tastes fancy but not fussy.

    • Fish: 1 to 1.5 lb salmon fillet, skin on
    • Seasoning: Mayo thinly spread (trust me), lemon pepper, pinch of brown sugar
    • Pellets: Apple or cherry
    • Temp: 225°F
    • Time: 45 to 60 minutes
    • Target: 125°F in the thickest spot

    Steps:

    1. Pat dry. Spread a very thin mayo layer. It keeps it moist and helps color.
    2. Season. Put on a sheet of foil or a cedar plank.
    3. Smoke at 225°F until it flakes and hits 125°F.
    4. Squeeze fresh lemon. Serve with rice or a simple salad—and if you’re into creamy toppings, a spoonful of cool avocado crema is magic; I tested three versions in this review.

    Notes:

    • The mayo trick changed my salmon game. You don’t taste it.
    • Cherry pellets gave a pretty color. Apple tasted a bit sweeter.

    Recipe 5: Game-Day Smoked Queso (Warning: It Disappears)

    It’s messy, salty, and perfect for football. It’s not healthy. It is happy.

    • Pan: 9×13 aluminum pan
    • Stuff: 1 lb Velveeta (cubed), 1 block pepper jack (cubed), 1 can Rotel, 1 small onion (chopped), 1 lb chorizo (browned), handful of chopped cilantro
    • Pellets: Hickory or mesquite blend
    • Temp: 250°F
    • Time: 60 to 90 minutes, stir every 20 minutes

    Steps:

    1. Brown the chorizo on the stove. Drain it.
    2. Add everything to the pan.
    3. Smoke at 250°F. Stir now and then.
    4. Serve with warm chips. Keep it on “keep warm” if folks graze.

    Tip:

    • Toss in a tiny splash of beer near the end if it gets too thick.

    Bonus: Skillet Mac and Cheese on the Grill

    My kids cheer for this. Grown-ups do too.

    • Skillet: 12" cast iron
    • Stuff: 1 lb elbow pasta (cooked and drained), 2 cups milk, 2 cups sharp cheddar, 1 cup Monterey Jack, 2 tbsp butter, salt, pepper, pinch of garlic powder, crushed Ritz on top
    • Pellets: Apple
    • Temp: 300°F
    • Time: 30 minutes

    Steps:

    1. Mix the cooked pasta with milk, cheese, butter, and seasonings in the skillet.
    2. Top with crushed crackers.
    3. Bake at 300°F for 30 minutes. You’ll see the edges bubble.
    4. Rest 5 minutes. Scoop big.

    What Went Wrong (And How I Fixed It)

    • Low Smoke Flavor: Some cooks tasted a bit mild. Using the A-MAZE-N smoke tube for the first hour helped. So did hickory pellets.
    • Rain and Pellets: One storm turned my pellets to oatmeal. I learned to keep them in a sealed bucket with a gamma lid. I now check the hopper right before I cook.
    • Temp Swings in Winter: When it
  • I Tried the “Blue Salt” Trick — Here’s What Worked (and What Flopped)

    Quick outline

    • What the blue salt trick is
    • Two ways to get blue salt
    • My step-by-step recipe
    • Real dishes I made at home
    • What I loved and what bugged me
    • Tips so you don’t waste salt
    • Final take

    So… what’s the “blue salt” trick?

    It’s two things, really.

    1. Coloring your own salt with butterfly pea flower. It turns a bright ocean blue. Then it shifts to purple or pink when it hits lime or lemon. Science moment: those flowers have a plant dye that reacts to acid. Fancy word: anthocyanins. Simple idea: blue now, purple later. If you want to geek out on the chemistry, check out this peer-reviewed overview of butterfly pea anthocyanins here.

    2. Using Persian blue salt. That one comes out of the ground with little blue crystals. It’s a finishing salt. It’s rare. It’s pricey. But it looks like tiny ice chips.

    I’ve made the first one many times. I also bought a tiny jar of the second from The Meadow in Portland while visiting my cousin. I tasted both on real food at home.

    The DIY Blue Salt Recipe I Actually Use

    I keep this in a small Mason jar on my counter. It lasts a month, easy.

    What you need

    • 4 tablespoons kosher salt (I use Morton)
    • 1 teaspoon butterfly pea flower powder (Suncore Foods is what I grabbed)
    • 1 teaspoon lime zest (optional, but smells amazing)
    • A squeeze of lime or lemon when serving (for the color change)

    How I make it

    1. Put the salt and butterfly pea powder in a bowl. Whisk. It turns deep blue fast. No clumps.
    2. Stir in the lime zest. The salt stays blue. The zest adds a fresh pop.
    3. Spread the mix on a plate. Let it air-dry 15 minutes. (If it feels damp, it cakes up in a jar.)
    4. Store in a jar. Keep it away from steam. Don’t park it near the stove.

    Rim trick for drinks

    • Rub the rim of your glass with a lime wedge. Dip the rim in the blue salt.
    • Pour your drink. When the drink hits the rim, the blue turns purple. It’s a party trick that never gets old.

    Does it taste different?
    The taste is salt-forward with a tiny floral note if you sniff hard. It won’t make your food taste weird. If you’re into experimenting with other homemade spice blends, you might like my test run of a Greek seasoning recipe—it turned out way better than I expected.

    Real Things I Made With It (No Fakes Here)

    • Blue Margarita Night:
      I used Espolòn Blanco, fresh lime, a splash of agave, and Topo Chico for fizz. The rim turned from royal blue to bright purple with the first sip. My friend Jess actually paused and said, “Okay, show-off.” We laughed because it looked fancy, but it was easy.

    • Grilled Watermelon Salad:
      Cubes of watermelon, crumbled feta, mint, and a pinch of blue salt. A squeeze of lemon on top made the blue flecks go lavender. Sweet, salty, and a little tart. Great on a hot day.

    • Crispy Chicken Cutlets:
      I fried thin chicken cutlets and, while they rested, I finished with the blue salt and a squeeze of lemon. The color shift was subtle on the crunchy crust, but the lemon made it pop.

    • Chocolate Chip Cookies (Yes, really):
      I used my go-to recipe with Ghirardelli 60% chips. Right when they came out, I sprinkled a tiny bit of blue salt. When they cooled, I dotted on a touch of lemon zest. No heavy citrus, just aroma. The blue looked like confetti on top. Kids loved it. Adults pretended they didn’t.

    • Soft Scrambled Eggs:
      Butter, low heat, creamy eggs. A light sprinkle of blue salt and a few drops of lemon at the table. It went mauve in little specks. Looks fancy, tastes simple.

    • Smoked Veggie Platter on the Pellet Grill:
      I grilled zucchini, bell peppers, and red onion on my pellet grill after a month-long deep-dive (get the real scoop here). A sprinkle of blue salt plus a squeeze of lemon made the charred edges glow purple.

    The Store-Bought Fancy Stuff: Persian Blue Salt

    I bought a small jar of Persian blue salt from The Meadow. The crystals are pale and glassy with bright blue sparks. It’s mild and a little crunchy. A recent mineralogy report dives into why those specks turn up blue in the first place—turns out it’s the crystal lattice trapping trace minerals, not dye—worth a skim here.

    Where it worked great

    • Seared scallops with brown butter and lemon. A few crystals on top. Clean snap.
    • Burrata with olive oil and strawberries. Sweet and salty. Very pretty.
    • Sliced heirloom tomatoes. No pepper. Just oil and the blue flakes. Summer on a plate.

    Where it flopped

    • In soup or pasta water. The blue disappears, and you can’t tell it’s special.
    • On anything super saucy. The crunch dies fast.
    • Big roast with lots of spice rub. It gets lost.

    Is it worth it?
    For photos or a date dinner—yes. For everyday cooking—probably not. It’s not cheap, and it shines only as a finishing touch.

    What I Loved (and What Bugged Me)

    Good stuff

    • The DIY mix looks bold but tastes clean.
    • The color change with citrus is pure joy. It makes people smile.
    • It stores well if you keep it dry.
    • It’s fun for kids, but also feels chef-y for adults.

    Not so good

    • If steam hits the jar, it clumps like wet sand.
    • Use too much powder, and it goes dusty on your tongue.
    • On dark meats, the color can vanish. Then it’s just… salt.

    Tips So You Don’t Waste Salt

    • Start with less powder. You can always add more.
    • Dry your mix before you jar it. A quick 5 minutes in a very low oven (like 170°F) works if your kitchen is humid.
    • For drinks, rim only the outside of the glass. Keeps the salt from falling into the drink.
    • For food, finish at the table. Then splash a dot of lemon. Watch the color flip.

    Quick FAQ I Wish I’d Had

    • Can I use table salt?
      You can, but it tastes sharper. I like kosher for better pinch control.

    • Can I use food coloring instead?
      Yes, but no color change. You lose the “magic.”

    • Is the powder safe?
      Butterfly pea flower is an edible tea. If you’re pregnant or on meds, check with your doc, like you would with any herbal tea.

    Final Take

    The blue salt trick is a keeper. The DIY version is cheap, fast, and cheerful. The Persian blue salt is lovely but niche. If you’d rather taste a chef’s spin on color-changing salt, the team at Bistro Le Clochard plates it with the kind of flair that’ll make you reach for your phone before your fork. Use it when you want a tiny “wow.” Honestly, this is one of those small kitchen things that makes a normal night feel special. And that’s the whole point, right?

    Speaking of adding a playful spark to an evening, maybe you’re also curious about surprising your partner after dinner in the digital world—if so, this straightforward guide to Kik sexting breaks down how to flirt safely, set boundaries, and keep the conversation exciting so you can spice things up with confidence long after the dishes are done.

    If you’re in or around Paragould and would rather share those purple-rimmed margaritas with someone new in real life—without endless swiping—take a peek at Skip the Games Paragould; the site curates local, no-strings-attached meetups, helping you connect quickly so you can spend more time enjoying great food and even better company.

  • I Baked Through My Top Cookie Recipes: A Real-Deal, First-Person Review

    I baked a lot. Like, a lot-lot. Over three Saturdays, I tested 12 cookie recipes in my small kitchen. Flour hit the air. Butter wrappers piled up. My kids stole the warm ones (caught red-handed). Neighbors stopped “by chance.” You know what? It was a good week.

    Want the minute-by-minute diary of that sugar-flour whirlwind? I broke it all down in this no-holds-barred, real-deal cookie bake-off review.

    Here’s the thing. I wanted real winners. Cookies that work on a busy Tuesday and for a big party too. I weighed the ingredients, used the same pans, and wrote down every change. I even did a tiny taste test with my block. It got serious. Fun-serious.

    Below are the five recipes I reach for now. Each one is a keeper for a different mood. I’ll share what I loved, what annoyed me, and how to nail it at home.


    How I Tested (Quick and Honest)

    • Oven: 350°F for most, middle rack. I used a cheap oven thermometer because my oven lies.
    • Pans: Two Nordic Ware half-sheets with parchment. No silicone mats this time.
    • Tools: KitchenAid mixer for big batches, hand whisk for small ones; OXO scale for grams.
    • Butter: Mostly store brand, plus one batch with Kerrygold for fun.
    • Chocolate: Guittard baking wafers and Ghirardelli chips. Both melted nice.

    I let most doughs rest at least 30 minutes. Not a rule, but it helps with spread and flavor. And yes, I ate too much dough. Occupational hazard.


    1) Brown Butter Chocolate Chip Cookies (My House Favorite)

    These taste cozy and rich. The edges get crisp. The center stays soft. The brown butter adds a nutty smell that feels a little fancy, but not fussy. That nutty depth comes from the Maillard reaction that occurs while browning butter (scienceofcooking.com).

    What I loved

    • Big chocolate pools. Not just tiny dots.
    • They freeze well. I bake four, freeze twelve.
    • That caramel note. It hits you warm.

    What bugged me

    • You must cool the browned butter. If you rush it, the dough goes greasy.

    Ingredients

    • 3/4 cup unsalted butter (170 g), browned and cooled 15 minutes
    • 3/4 cup packed brown sugar (150 g)
    • 1/2 cup white sugar (100 g)
    • 1 large egg + 1 yolk
    • 1 1/2 teaspoons vanilla
    • 1 3/4 cups all-purpose flour (225 g)
    • 1/2 teaspoon baking soda
    • 1/4 teaspoon baking powder
    • 3/4 teaspoon fine salt
    • 1 heaping cup chopped dark chocolate or wafers (170–200 g)
    • Flaky salt on top (optional)

    Steps

    1. Brown the butter in a light pan. Stir, watch the milk bits go golden, then cool 15 minutes.
    2. Whisk browned butter with both sugars. Add egg, yolk, and vanilla.
    3. In another bowl, whisk flour, baking soda, baking powder, and salt.
    4. Stir dry into wet. Fold in chocolate.
    5. Scoop 2 tablespoons each. Chill 30 minutes, or up to 24 hours.
    6. Bake at 350°F for 10–12 minutes. Tops should look set at the edges, pale in the center. Sprinkle salt if you like. Rest 5 minutes.

    Tester notes

    • Day-two dough had deeper flavor and less spread. Worth it.
    • My neighbor Julie called these “dangerous.” She was right.

    2) Chewy Oatmeal Raisin (Soft, Cozy, Not Dry)

    I wanted that bakery chew without a slab of sugar. These gave me soft centers, a little cinnamon breath, and juicy raisins that didn’t turn into pebbles.

    What I loved

    • Soaking the raisins in warm water made them plump. Small trick; big win.
    • Not too sweet. You can eat two and not feel wild.

    What bugged me

    • The dough looks crumbly at first. Keep mixing. It comes together.

    Ingredients

    • 1/2 cup unsalted butter (113 g), soft
    • 3/4 cup packed brown sugar (150 g)
    • 1/4 cup white sugar (50 g)
    • 1 large egg
    • 1 teaspoon vanilla
    • 3/4 cup all-purpose flour (90 g)
    • 1/2 teaspoon baking soda
    • 1/2 teaspoon ground cinnamon
    • 1/2 teaspoon fine salt
    • 1 1/2 cups old-fashioned oats (135 g)
    • 3/4 cup raisins (110 g), soaked in warm water 10 minutes, drained well
    • Optional: 1/2 cup chopped walnuts

    Steps

    1. Cream butter and both sugars until fluffy. Add egg and vanilla.
    2. Whisk flour, baking soda, cinnamon, and salt. Add to bowl.
    3. Stir in oats, then raisins (and nuts if using).
    4. Scoop 1 1/2 tablespoons each. Chill 20 minutes.
    5. Bake at 350°F for 10–11 minutes. Edges set, middles soft. Rest 5 minutes.

    Tester notes

    • If you want thicker cookies, add 1 extra tablespoon flour.
    • These traveled well in lunch boxes. No crumble mess.

    3) Classic Peanut Butter Crisscross (Crowd-Pleaser, Freezer-Friendly)

    These are soft, rich, and fast. The fork marks make me smile. Old-school in the best way.

    What I loved

    • The dough freezes like a champ.
    • Peanut flavor is bold without being heavy.

    What bugged me

    • Overbake by one minute, and they dry. Watch them.

    Ingredients

    • 1/2 cup unsalted butter (113 g), soft
    • 3/4 cup creamy peanut butter (190 g)
    • 1/2 cup white sugar (100 g)
    • 1/2 cup packed brown sugar (100 g)
    • 1 large egg
    • 1 teaspoon vanilla
    • 1 1/4 cups all-purpose flour (155 g)
    • 1/2 teaspoon baking soda
    • 1/4 teaspoon baking powder
    • 1/2 teaspoon fine salt

    Steps

    1. Cream butter, peanut butter, and both sugars. Add egg and vanilla.
    2. Mix flour, baking soda, baking powder, and salt. Add to bowl.
    3. Scoop 1 tablespoon balls. Press crisscross with a fork dipped in sugar.
    4. Bake at 350°F for 9–11 minutes. Edges set, centers soft.
    5. Cool on the pan 5 minutes.

    Freezer tip

    • Freeze shaped dough on a tray. Bag them. Bake from frozen at 350°F for 11–12 minutes.

    4) Snickerdoodles With That Tang (Soft and Puffy)

    These taste like a warm hug. Cream of tartar gives a tiny tang, which makes the cinnamon pop.

    What I loved

    • Puffy tops. Soft bite. Cinnamon sugar crust.
    • Very fast. Great for last-minute guests.

    What bugged me

    • If you skip chilling, they can spread more than you want.

    Ingredients

    • 1/2 cup unsalted butter (113 g), soft
    • 3/4 cup white sugar (150 g)
    • 1 large egg
    • 1 teaspoon vanilla
    • 1 1/3 cups all-purpose flour (160 g)
    • 1 teaspoon cream of tartar
    • 1/2 teaspoon baking soda
    • 1/4 teaspoon fine salt
    • For rolling: 1/4 cup sugar + 1 1/2 teaspoons ground cinnamon

    Steps

    1. Cream butter and sugar. Add egg and vanilla.
    2. Whisk flour, cream of tartar, baking soda, and salt. Add to bowl.
    3. Chill 20 minutes.
    4. Scoop 1 tablespoon balls. Roll in cinnamon sugar.
    5. Bake at 375°F for 8–10 minutes. Tops crack. Centers look set but soft.

    Pro tip

    • For extra puff, swap 2 tablespoons of flour with cornstarch. It works.

    5) Easy Slice-and-Bake Shortbread (Crisp Edges, Tea-Time Vibes)

    This one’s simple and clean. Buttery. Not too sweet. You can dress the edges in coarse sugar or dip half the cookie in melted chocolate.

    What I loved

    • No fuss. Dough logs live in my fridge, waiting.
    • They stay crisp for days.

    What bugged me

    • Overmixing makes them tough. Keep it gentle.

    Ingredients

    • 1 cup unsalted butter (226 g), soft but cool
    • 2/3 cup powdered sugar (80 g)
    • 1 teaspoon vanilla
    • 2 cups all-purpose flour (240 g)
    • 1/2 teaspoon fine salt
    • Optional: coarse sugar for rolling, or mini chips pressed on the sides

    Steps

    1. Beat butter and powdered sugar until smooth, not airy. Add vanilla.
    2. Add flour and salt. Mix just till it forms clumps. Press
  • I Tried the Starbucks Banana Bread Recipe at Home — Here’s What Actually Worked

    Hey, I’m Kayla. I love banana bread more than I should. That slice at Starbucks? The one with the soft crumb and those walnuts on top? Yeah. I buy it with a tall blonde roast when I need comfort.

    But last month, I had three sad bananas on the counter, a rainy Sunday, and a stubborn mood. I baked three copycat loaves. Back to back. My kitchen smelled like a coffee shop, and my kids kept asking, “Is it done yet?”

    Here’s what I found.


    Quick Plan (so you know where I’m going)

    • What the real Starbucks slice tastes like
    • The three versions I baked
    • The one recipe that nailed it (with numbers you can use)
    • Real mess-ups I made and how I fixed them
    • Cost, time, and storage
    • Who should try it
    • My final score

    How the Real Slice Tastes (my baseline)

    I bought a slice on a Tuesday at 8:10 a.m., right after school drop-off. Price: $3.95 here in Ohio. It was:

    • Moist, but not wet.
    • Dense, but still tender.
    • Very banana. Not much spice.
    • Sweet crust edge. Toasty walnut bits. No cinnamon swirl.

    The crumb (the inside) is tight, not airy. It feels rich, like oil or sour cream is in there. That’s the vibe I chased.

    For another delicious bakery-style bite on a sunny patio, poke around Bistro Le Clochard and see how the pros pair sweet loaves with good coffee.

    Want every measurement and troubleshooting note in one place? I lined them all up in this step-by-step piece: I tried the Starbucks Banana Bread recipe at home—here’s what actually worked.


    What I Baked at Home

    I tested three copycat styles in my 9×5 Nordic Ware pan:

    1. All-butter loaf
    2. Oil plus sour cream
    3. Yogurt loaf with a bit less sugar

    I used King Arthur all-purpose flour, Costco walnuts, and a ThermoWorks instant-read thermometer. And a stack of sticky notes, which is very “me.”

    If you prefer precise bakery-style instructions, you might compare my experiments with the popular Starbucks Banana Bread Recipe shared by CopyKat Recipes, which uses a similar oil-based batter.


    The Winner: Oil + Sour Cream Copycat

    This was the closest match to Starbucks at my house. It had the right chew and a sweet, shiny top.

    Here’s the exact version that worked for me:

    • 3 very ripe bananas, mashed smooth (about 300 grams)
    • 1/2 cup white sugar (100 g)
    • 1/2 cup light brown sugar, packed (100 g)
    • 1/2 cup neutral oil (I used canola)
    • 1 large egg + 1 yolk
    • 1 teaspoon vanilla
    • 1 3/4 cups all-purpose flour (about 220 g)
    • 1 teaspoon baking soda
    • 1/2 teaspoon baking powder
    • 1/2 teaspoon kosher salt
    • 1/3 cup sour cream (80 g)
    • 2/3 cup chopped walnuts, plus extra for the top

    Steps I did in my kitchen:

    1. Heat oven to 325°F. Grease a 9×5 loaf pan. Line with a long strip of parchment so you can lift it out.
    2. Whisk bananas, sugars, oil, egg + yolk, and vanilla in a large bowl. Smooth is key.
    3. In another bowl, whisk flour, baking soda, baking powder, and salt.
    4. Add dry mix to wet. Fold with a spatula. Stop when you still see a few flour streaks.
    5. Fold in sour cream and 2/3 cup walnuts. Don’t overmix.
    6. Pour into pan. Sprinkle more walnuts on top.
    7. Bake 60 to 70 minutes. I tented with foil at 45 minutes so the nuts didn’t burn.
    8. It’s done when a toothpick has a few moist crumbs, or when the center hits around 200°F.
    9. Cool in pan 15 minutes. Lift out. Cool at least 2 hours. Wrap and rest overnight if you can. It gets better.

    For another home-baked perspective—with extra tips on achieving that caramelized crust—you can also read the well-loved Starbucks Banana Bread Recipe from Sugar and Soul.

    Taste check the next day: The crumb set up like the Starbucks slice. The crust had a light sugar edge. My 10-year-old said, “It tastes like the store one.” Win.


    Real Examples: My Mistakes (and Fixes)

    • First loaf sank in the middle. Why? I pulled it at 62 minutes. The center was about 188°F. That was too low. At 200°F, it held shape.
    • I used frozen bananas on the second try. I thawed them in a bowl, then poured off 2 tablespoons of extra liquid. If not, the loaf turns mushy.
    • I tried butter only. It smelled amazing, but the crumb felt a little cake-like, not chewy enough. Tasted great though—just not “Starbucks.”
    • I added 1 teaspoon cinnamon once. Tasty, but then it didn’t taste like Starbucks. If you want that coffee shop copy, skip the spice.
    • I forgot to tent the top on bake #2. The walnuts got too dark at minute 55. A loose foil tent at minute 45 solved it.
    • Used an 8.5×4.5 Pyrex pan one time. The loaf baked taller and took 75 minutes. This shape looked closer to the Starbucks slice.

    If you’re itching to branch out after banana bread, I baked through a marathon of sweets and ranked them in my real-deal cookie recipe review. Spoiler: some brown-butter magic awaits.


    Cost, Time, and Storage

    • Time: About 15 minutes to mix, 60–70 minutes to bake, and a cool time you’ll hate but need.
    • Cost: My rough total was about $3.60 for the whole loaf. I cut 10 slices, so about 36 cents each. Way cheaper than a coffee run.
    • Storage:
      • Day 1: Very soft. Sweet top.
      • Day 2: Peak texture. Best day.
      • Day 3: Still good, but a bit dryer at the edges.
      • Freezer: I wrap slices and stash them. They thaw in lunch boxes by noon. Handy for school days.

    Texture Notes (for the nerds and the hungry)

    • Oil helps with that soft, even crumb and keeps it moist on day two.
    • Sour cream adds fat and a tiny tang. It also helps tenderize.
    • Don’t beat the batter. Overmixing wakes the gluten. Then the loaf gets tough.
    • Weighing bananas matters. Too much banana will make the center gummy. I aim for 300 g.

    Pros and Cons from My Counter

    Pros:

    • Very close to Starbucks taste and feel
    • Moist for days
    • Easy to scale and freeze
    • Looks pretty with walnut top

    Cons:

    • Cool time feels endless
    • Easy to underbake the center
    • On the sweet side (which I like, but still)

    Who Should Make This

    • New bakers who want a win on the first try
    • Busy parents packing snacks
    • Coffee lovers who want that store vibe at home
    • Folks who like nuts; swap in chocolate chips for picky kids

    Singles who are nesting at home with a warm loaf cooling on the counter might also be curious about how modern connections are forged beyond the kitchen table. Take a peek at How Adult Video Chat Is Changing Online Dating to learn how live video platforms, safety features, and new etiquette are reshaping everything from first impressions to virtual coffee dates.

    For readers in Northern California who would like to swap fresh-baked slices for real-life smiles, the local noticeboard at Skip the Games Chico highlights casual meet-ups and spontaneous coffee dates around Chico, giving you an easy way to step out of the kitchen and into a fun local scene.

    Need something bright and refreshing to serve next to your sweet slice? Check out my hands-on review of a cranberry salad recipe for a zingy contrast.


    Final Take

    I give this copycat a 9/10. It’s not magic. But it’s close. When I’m racing to a PTA meeting, I’ll still grab the store slice with my latte. But when I have bananas going brown and a quiet afternoon, this loaf hits the same spot, slice after slice.

    If you try it, let it rest overnight. I know, I know. But you’ll taste why.

    — Kayla Sox